
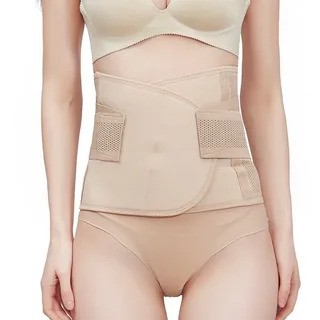
Belly belts, also known as maternity belts or belly bands, are indispensable accessories for pregnant women, offering support, comfort, and relief during pregnancy and beyond. These versatile garments provide gentle compression and stability to the abdominal area, helping alleviate discomfort and promote well-being. In this comprehensive guide, we’ll explore the myriad uses of belly belts and provide a step-by-step tutorial on how to make a belly belt for women at home.
Part 1: Understanding the Uses of Belly Belts
1. Pregnancy Support:
- Belly belts are primarily used during pregnancy to provide support and alleviate discomfort associated with a growing belly.
- They help redistribute the weight of the baby bump, relieving strain on the lower back, hips, and pelvis.
- Belly belts can reduce back pain, pelvic girdle pain, and discomfort while standing, walking, or performing daily activities.
2. Postpartum Recovery:
- After childbirth, belly belts can aid in postpartum recovery by providing gentle compression to the abdomen.
- They help support abdominal muscles and tissues as they heal, promoting faster recovery from childbirth.
- Belly belts may also help shrink the uterus back to its pre-pregnancy size and provide support to the lower back during breastfeeding.
3. Core Stability and Posture:
- Belly belts offer core stability and support, which can help improve posture and reduce the risk of back strain and discomfort.
- They promote proper alignment of the spine and pelvis, reducing the likelihood of postural imbalances and associated pain.
4. Exercise and Physical Activity:
- Belly belts can be worn during exercise and physical activity to provide additional support and stability to the abdominal area.
- They help prevent excessive movement of the belly and reduce discomfort during activities such as walking, jogging, or prenatal yoga.
Part 2: Crafting Your Own Belly Belt
Materials Needed:
- Elastic fabric (such as cotton or spandex)
- Sewing machine or needle and thread
- Scissors
- Measuring tape
- Velcro or hook-and-loop fasteners
Step-by-Step Guide: 1. Measure and Cut the Fabric:
- Measure the circumference of your abdomen at its widest point (typically around the belly button) to determine the length of the belly belt.
- Cut a piece of elastic fabric to the desired length, ensuring it is wide enough to provide adequate support.
2. Sew the Ends Together:
- Fold the fabric lengthwise with the right sides facing inward, aligning the edges.
- Sew along the length of the fabric to create a tube, leaving both ends open.
3. Add Fasteners:
- Attach Velcro or hook-and-loop fasteners to each end of the belly belt to allow for adjustability and a secure fit.
- Ensure the fasteners are evenly spaced and securely sewn onto the fabric.
4. Finish the Edges:
- Trim any excess fabric and finish the edges of the belly belt with a zigzag or overlock stitch to prevent fraying.
- Turn the belly belt right side out and press the seams with an iron to flatten them.
5. Customize as Desired:
- Decorate the belly belt with embellishments such as ribbons, bows, or fabric flowers to add a personal touch.
- Experiment with different fabric colors and patterns to create a unique and stylish belly belt.
Conclusion:
Belly belts are invaluable tools for women during pregnancy and beyond, offering support, comfort, and stability when they need it most. Whether worn during pregnancy for relief from discomfort or during postpartum recovery to aid in healing, belly belts play a crucial role in promoting women’s health and well-being. By following the simple steps outlined in this guide, women can create their own belly belts at home, customizing them to suit their individual preferences and needs.